Home > Blog > Short Shot in Injection Molding: A Systematic Troubleshooting Checklist
Short Shot in Injection Molding: A Systematic Troubleshooting Checklist
By SharonNovember 20th, 20261 views
Process Troubleshooting · Defect Guide · Injection Molding
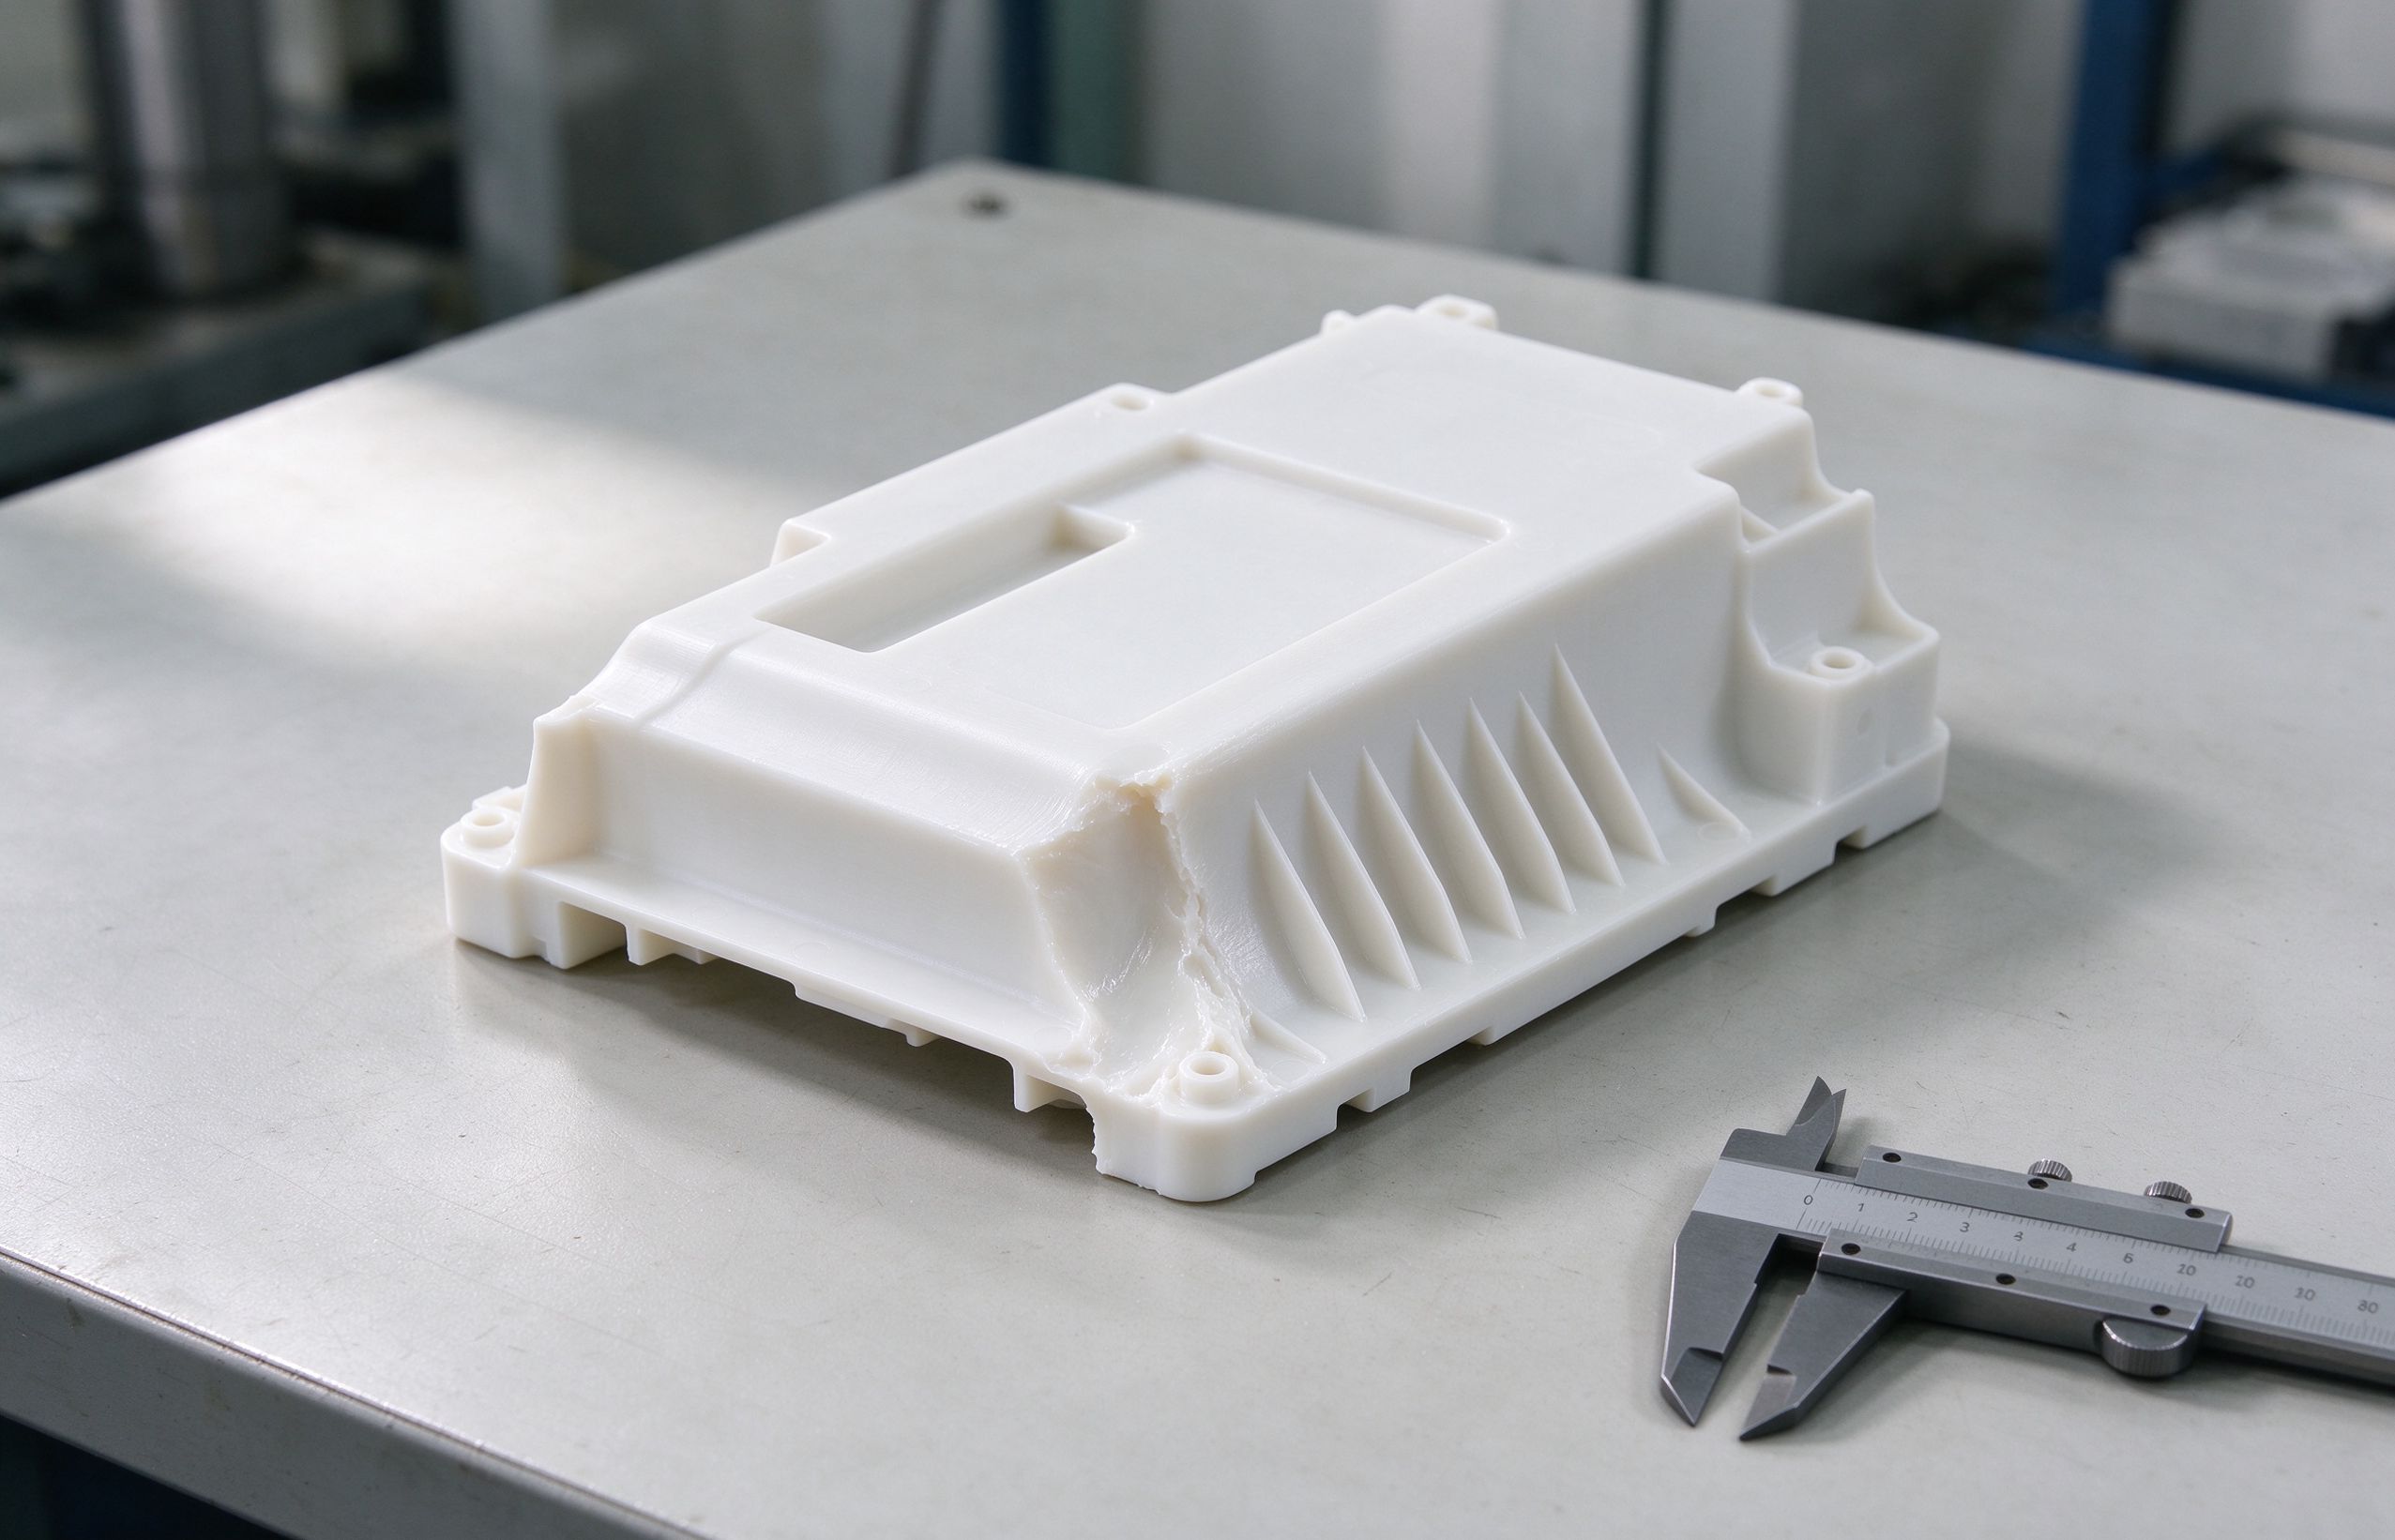
A short shot means the melt froze before the cavity was full. It looks simple to fix, but it is rarely solved by turning up one pressure dial. The reliable route is to work through four layers — material, process, mold, machine — one variable at a time, instead of changing the whole window in one shot.
Reading time 8 min / Applies to: T1 sampling, pilot runs and production defect escalation
Short shot is one of the most common defects seen on first trials, and one of the most expensive to chase when the team guesses. The part arrives with an incomplete corner, a short rib, or a thin wall that never fills, and the first instinct is to raise injection pressure and speed. That often pushes the melt through, but it can also bring flash, burn marks and stress into a part that was nearly right.
This checklist separates the possible causes into four layers, in the order they are normally checked. It starts with the fastest, cheapest checks — material condition and basic process settings — and moves toward mold geometry and machine condition, where the fix takes longer and costs more.
Diagnosis order · cheapest check first
Material → Process → Mold → Machine
Record the baseline parameters before changing anything. Adjust one variable per trial, and note what moved the defect.
A short shot leaves an incomplete flow front, usually at the last-filled corner, rib tip or thin wall. Where the defect sits tells you which layer to inspect first.
01Recognise the defect before you touch the machine
Before changing any setting, confirm what you are looking at. Short shot is incomplete filling of the cavity; it is not a sink mark, a void or a weld line. Record where the melt stops, because the location points to the cause.
Last-filled corner or thin wall. The flow path is too long or the section too thin for the available pressure and melt temperature.
Rib tip or boss top. The melt freezes in a narrow section before it reaches the end; check rib thickness, gate distance and local cooling.
Random cavities in a multi-cavity mold. Flow imbalance between cavities, not a global machine problem.
Consistent incomplete area on every shot. A repeatable geometry or runner restriction; random variation points to material moisture, feeding or machine wear.
First recordPhotograph the defect, note the cavity number, and save the current parameter set — barrel temperatures, mold temperature, injection pressure and speed, hold pressure, shot weight and cycle time. You need a baseline to know whether each change helped.
02The four layers, mapped out
Use this table as the map. Each layer lists the typical causes and the check that confirms or rules it out. Work top to bottom; a problem found in an upper layer usually removes the need to open the mold.
Check MFI and grade against the datasheet; verify drying time and temperature; inspect pellets for specks or overheating; measure hopper feed.
Process
Melt or mold temperature too low, injection speed too slow, pressure or shot volume insufficient, weak hold, low back pressure, long residence time
Compare barrel and mold temperatures against the resin processing window; verify shot size against barrel capacity; review pressure and speed profile.
Mold
Runner or gate too small, restricted flow, poor gate location, inadequate venting, cold slug trap missing, thin wall or long flow length, imbalance across cavities
Inspect runner and gate dimensions on the mold layout; check vent depth and location; review flow length and wall thickness; compare cavity-to-cavity fill.
Machine
Worn non-return valve, screw or barrel wear, insufficient plasticising capacity, partially blocked nozzle, clamp or barrel mis-match
Check pressure build-up and shot repeatability; inspect nozzle and tip; verify machine shot capacity against part plus runner weight.
A short shot in one cavity only is almost never a machine problem; check runner balance and gate restriction first.
03Process parameter checklist
These are the settings to review before any mold work. Move one at a time, inside the resin manufacturer's processing window.
Temperature
Melt temperature too low: the resin enters the cavity thicker and freezes early. Raise barrel zones gradually and watch for degradation at the upper limit.
Mold temperature too low: the surface skin forms quickly and stalls the flow front. Check whether the coldest area matches the short-shot location.
Residence time too long in a large barrel: material degrades, loses flow, and causes weak, incomplete parts.
Injection and hold
Injection pressure too low: the melt cannot overcome flow resistance to the last corner.
Injection speed too slow: the melt cools before filling. Try a faster profile through thick sections, slowing near thin walls to avoid jetting.
Shot volume insufficient: the machine does not meter enough resin per shot to fill part plus runner.
Hold pressure and hold time too short: the cavity is filled but not packed; the part looks short around sinks and thick sections.
Back pressure and plasticising speed too low: the melt is not homogenised and feeds inconsistently shot to shot.
The machine itself can cause short shot through valve wear or capacity mismatch, but that should be ruled out only after material and process settings have been checked.
04Mold-side causes that process changes cannot fix
If the material is dry and the process window has been pushed within limits without fixing the defect, the restriction is in the mold. These are the items to review on the mold layout and at trial.
Runner or gate too small. A narrow runner or gate creates pressure drop so large that the melt loses energy before the cavity fills. Check gate cross-section against the part volume and resin flow length.
Gate in the wrong location. A gate that forces the melt around a long, thin path will fill late sections short. The gate should feed the heaviest section first, with the flow moving toward thinner areas.
Insufficient venting. Trapped air cannot escape and blocks the flow front; the part short-shots near the last-filled point, often with a burn mark nearby.
Cold slug or flow restriction. Missing or undersized cold slug well lets the first, cold material into the cavity and stalls the flow.
Wall thickness too thin for the flow length. A long, thin wall exceeds the resin's flow-length-to-thickness ratio. This is a part-design issue that process tuning will not cure.
Multi-cavity imbalance. Unequal runner lengths or gate sizes leave some cavities starved. Compare shot weight and fill pattern cavity by cavity.
05Material and machine checks
Material condition
Verify the resin grade and melt flow index match the part geometry; a low-flow grade on a thin-walled part will struggle to fill.
Confirm drying for hygroscopic resins such as PA, PC and PET. Moisture shows up as short shots combined with streaks or brittleness.
Keep regrind ratio under control; excessive regrind changes flow and consistency shot to shot.
Machine condition
Check the non-return valve: a worn valve loses pressure and metering, giving short or uneven fills.
Confirm barrel and screw capacity. An oversized barrel for a small part means long residence and degradation; an undersized one cannot plasticise fast enough.
Inspect nozzle and tip for blockage or cold material, and confirm nozzle contact against the sprue.
06Step-by-step troubleshooting sequence
Run the sequence below on every new short-shot case. It keeps the diagnosis ordered and makes it easy to hand the notes to the next engineer or to your molder.
Record the baseline. Photograph the defect, mark the cavity, and save the current temperature, pressure, speed, shot weight and cycle time.
Check the material first. Grade, MFI, drying, regrind ratio and pellet condition. Fix feeding and moisture before touching pressure.
Walk the process window. Raise melt and mold temperature within the resin range, then review injection pressure, speed, shot volume, hold and back pressure — one change per trial.
Inspect the mold layout. Runner and gate size, gate location, venting, cold slug well, wall thickness and multi-cavity balance.
Rule out machine wear. Valve seal, nozzle blockage, barrel capacity and plasticising rate.
Confirm the fix holds. Run a short sample series, check cavity-to-cavity consistency, and watch that the correction did not introduce flash, warpage or burn marks.
Two habits that make short shots worse
Changing five settings at once. You cannot tell which dial fixed it, and the part may be stable by luck rather than by a controlled window.
Compensating a bad mold with pressure. Pushing higher pressure to force a restricted runner fills the part but raises stress, flash risk and clamp load — the underlying mold issue stays unresolved.
Treat short shot as a filling problem to diagnose, not a pressure setting to force. Every defect location is telling you where the flow stopped.
Have a new plastic part to tool?
Send your new project drawings — STEP or STL files, resin requirements and annual volume — to our mailbox. Our engineers will review DFM, mold feasibility and process risks, and reply with tooling recommendations and a quotation.
DFM review and Moldflow flow analysis available before tool cutting ISO 9001 / ISO 13485 · HASCO and DME standard bases · T1 trial report and dimensional inspection supported
JBRplas · Custom injection molds and precision molding · Shenzhen, China Serving medical & dental, power tools, automotive electronics, POS and payment terminals, smart home, IoT and agricultural electronics, dispensing equipment, electrical relays and custom industrial hardware